OPPO OPDV971H Firmware
Do-It-Yourself (DIY) Instructions
Version: MVer: 05.00.01.07 Batch: 11-0830
Category: Minor Update
Release Date: September 21, 2006
Note: This release or its equivalent (MVer: 05.00.01.07 Batch: 10-0821B) is already pre-installed in all units shipped on or after the above release date.
Warning: Although DIY firmware upgrade is an easy and usually trouble-free process, an improper or failed firmware upgrade could render the DVD player unusable. Choose DIY only if you are aware of and accept the risks of performing DVD player firmware upgrade. Otherwise, you can contact OPPO at service@oppodigital.com or OPPO authorized resellers to send the player back for the upgrade.
Before You Start
- Follow the instructions EXACTLY; Don't press the "Open/Close" key until the player reboots itself. The entire process takes between 2-3 minutes. Stay focused and be patient during this process.
- Make sure the AC power connection is secured; use an Uninterrupted Power Supply (UPS) from your PC if necessary (in areas where AC is not stable). Do not interrupt power on the DVD player during the update process.
- The firmware will have factory default settings that may be different from the settings you currently have. You may want to note your current settings as you will have to reconfigure them after installing this firmware.
DIY Instructions
- View the release note below.
- Download the firmware from here.
- Burn a CD from the downloaded ISO image file. Be sure to burn the CD as an ISO image file, not a data file. The CD should contain a 935.BIN file if you burned it successfully. Please consult your CD burning software's help/instruction manual for more information on how to do this. Some general instruction for common CD burning software is listed below.
- Turn on your TV display and the OPPO player.
- Open the player tray and insert the firmware CD, and then close the tray.
- As soon as the CD is loaded, you will see "Press Play To Start" on your TV display. Press the PLAY key on the remote or the player once.
- The TV display shows "File Copying" and then "UPGRADING"
- In about 8 seconds, the CD will be ejected. Remove the CD quickly; DO NOT DO ANYTHING ELSE. What follows is the process when the player will reboot itself.
- DO NOT PRESS ANY BUTTONS NOR ATTEMPT TO CLOSE THE TRAY NOR UNPLUG THE POWER DURING THE REMAINING UPGRADE PROCESS.
- After approximately 1 - 2 minutes, the player reboots itself and closes the tray automatically to complete the process. The update process is completed when the front panel of the DVD player shows "No Disc".
- Eject the disc tray and then press the "OSD" button on the remote control to verify the firmware version.
- Congratulations! You have just completed the firmware upgrade.
For Silver/White Remote Control Users Only:
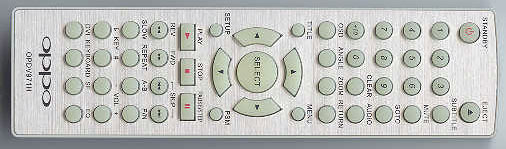
If you have the old silver/white remote control (see picture above), after completing the above steps, you need do the following once-only process to make the remote work with the new firmware:
- Turn on your DVD player and display device.
- Eject any disc that may be inside of the DVD player. Remove the disc and close the tray.
- Wait for the display message "No Disc" to appear in the upper left corner of your display device.
- Press and hold (hard) the Stop button on the front panel of the DVD unit (NOT THE REMOTE) for 5 seconds. Release.
- The new message "Old RC" will appear briefly in the upper left hand corner of your display unit.
The DVD player will now respond correctly to the silver/white remote control.
Release Note
This release addresses a rare occurrence of no center audio channel output through the 5.1ch analog audio output. It also includes all the following new features and improvements from the 10-0720 major release version:
1. Improved handling of "forced subtitle" for DVD discs
This version improves the handling of "forced subtitle" for DVD discs. For certain DVD discs that contains foreign "forced subtitle" tracks, foreign subtitle text will no longer erratically appear when there is english text in the picture. Additionally, when the dialog is in a foreign language and the DVD disc contains a corresponding English "forced subtitle" track, English subtitle will automatically show.
2. Improved disc compatibility
This version resolves the playback problem with certain Sony DVD discs that contains a "Commentary Disclaimer" screen. It also improves compatibility with DVD-Video disc recorded using older version of Nero Burning ROM program.
3. Improved audio/video synchronization (previously included in the F-0316 beta firmware)
This version of firmware reduces the time difference between audio and video outputs. Due to the time required to decode and process the audio and video contents encoded on a DVD disc, there is usually a time difference between the audio and video outputs. In previous firmware versions the time difference could be large enough to cause noticeable "lip sync" problems under certain circumstances. In this version the time difference is reduced. This version also reduced the variation of A/V synchronization caused by playback control operations such as pausing, repeating, chapter skipping and accessing the setup menu.
Special thanks to Gary Bosman for his contribution to this improvement.
4. Eliminated Chroma Up-sampling Error (CUE) for component output
Chroma Up-sampling Error is a problem that could happen when the reduced resolution Chroma data (color information) on the DVD discs are up-sampled to create full resolution color image. When it happens, edges, especially diagonal edges of saturated color will have a "staircase" or "mini-blind" effect. The OPDV971H does not have CUE with its DVI output. This version eliminates CUE on its component output.
5. Improved resume play function
This function works for DVD-Video discs only. To save a playback position so that you can resume later, press the "EJECT" button on the remote while the video is playing. The player will show "Saving Breakpoint…" on screen and eject the disc tray. Next time when the same DVD disc is loaded into the player, it will automatically resume from the saved playback position. You may cancel this automatic resume playback and start play from the beginning by pressing the "STOP" button on the remote control.
The memory function can remember 1 breakpoint only. Any new "EJECT" operation will overwrite the previous breakpoint with a new one.
6. Improved DivX video playback functions
This version of firmware properly supports DivX video files larger than 2GB. Fast forward and reverse speed are improved. It also improved compatibility with DivX video files that contains incomplete or corrupted index. With previous firmware version, these files may not play completely. With this firmware version the player will try to play the entire program despite the missing or corrupted index. However fast forwarding or reverse may not work in this case. For DivX files with associated text subtitles, the font size of the subtitle can be adjusted using the DVD player's setup menu.
7. Output resolution display
When the "DVI" button on the remote control is pressed, the current DVI output resolution will be displayed on the screen as well as the on the player's front panel. To actually switch the output resolution, stop playback so the OPPO logo screen is shown. Press the "DVI" button once to display the current resolution. Press it again to switch to the next available output resolution. The new resolution will also be displayed on both the screen and front panel.
8. Enhanced front panel dimmer control
The "Light Control" setup menu option has been expanded to support 4 modes:
- On - Both the Vacuum Fluorescent Display (VFD) window and the button LED lights are on.
- LED Off - Button LED lights are turned off; VFD window is on.
- Dim - Button LED lights are turned off; VFD window is at reduced brightness.
- All Off - All front panel lights and displays are turned off. This setting resumes back to "On" after the player is turned off to avoid user confusion.
9. Skip function for digital music files
When playing digital music files, the "Skip Prev" (|<<) and "Skip Next" (>>|) buttons on the remote control can be used to skip to the the previous or next track. This function enables the user to skip tracks without using the navigation menu on the video screen. When playback is stopped, these buttons can still be used to turn pages for the the on screen navigation menu, just like with the previous firmware version.
The User Manual has been updated to reflect the above improvement. It is available for downloading as a PDF file here.
General instructions on working with ISO image files
Note: These are general instructions on how to burn the firmware CD with common CD burning software. Please consult your CD burning software's help/instruction manual for more detail.
- In Nero Burning Rom version 6 or 7 , go to the 'Recorder > Burn Image…' menu and select the ISO image you downloaded.
- In Nero Burning ROM version 5 or earlier, just go to Nero Burning ROMs 'File > Burn Image' option and select the ISO image you downloaded.
- In Nero Express select the option for 'Disc Image or Saved Project' to select the ISO image file you downloaded and burn to CD.
- In Easy CD Creator, go to 'File > Record CD from CD Image' and select the ISO image you downloaded.